E-commerce is projected to be $8.1 Trillion global economy by 2026. In simple terms, 24% of all retail purchase is expected to be through online platforms by 2026 (Source: Forbes).
A good amount of investment is needed in setting up an eCommerce business from building an online store, adding products, and managing stocks to marketing and handing customers queries. One of those investment is “photo-shooting your products” to showcase on your online store.
Brands are hiring agencies for this purpose by investing thousands of dollars. But, what if I say that all this investment can be saved with this new AI tool that’s built for eCommerce product photos.
Here’s Mokker AI – an eCommerce solution for products photos.
What is Mokker AI Tool?
Mokker is an AI tool for background generation for eCommerce products. Its an eCommerce cost-effective solution for product photo generation without hefty studio setup.
You can turn a simple picture of your product into a professional studio like image within a few minutes using Mokker AI.
Here’s a short/reel for quick demonstration of Mokker AI tool.
Isn’t this simple yet powerful solution for eCommerce brands?
Let’s learn to use Mokker AI tool step by step and understand it pros & cons, and best use cases.
How to use Mokker AI?
In order to use Mokker AI, visit the website: https://mokker.ai/
- Sing up to Mokker AI
- After sign up, every user get 40 Free credits to try this tool.

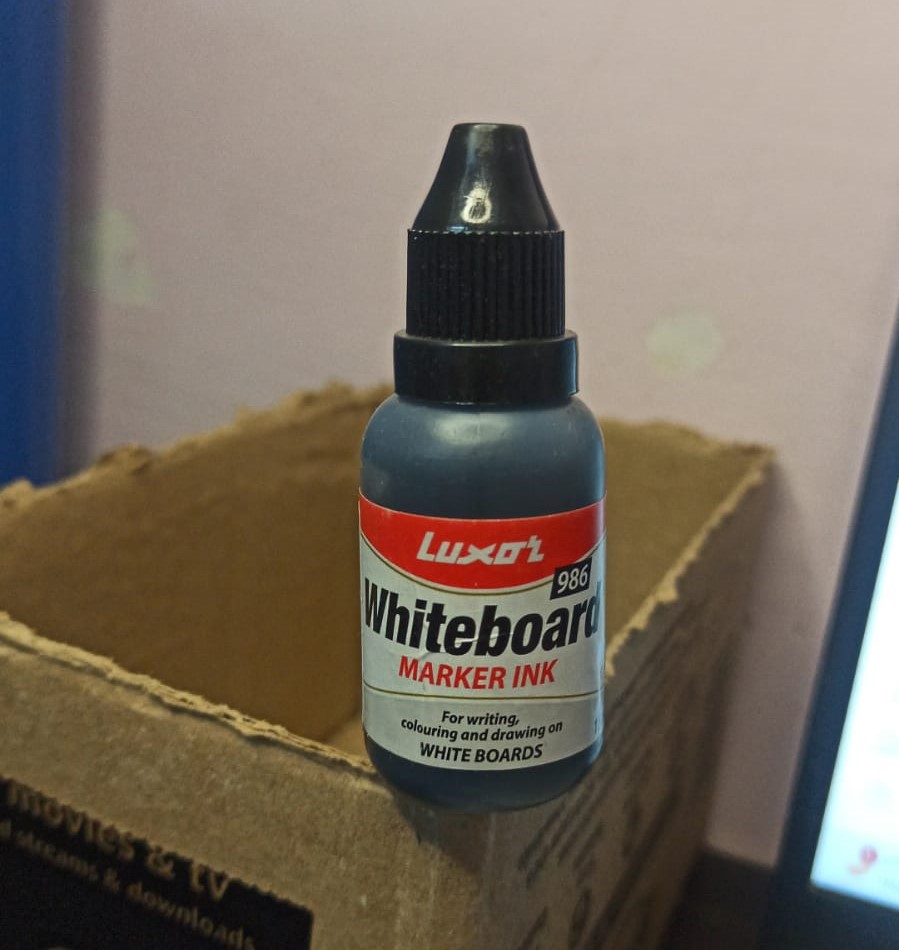
3. Let’s say, you own an eCommerce store where you are planning to sell blank-ink of marker. But, I have no budget to setup an studio or hire a model for it. So I am going to use Mokker to turn my simple mobile-clicked image of product into professional product image.
Here’s my mobile-clicked image:
4. Next, go to your Mokker dashboard, upload this mobile-clicked product image. As the image is uploaded, the background image is automatically removed.
5. From the Templates option, pick the one that matches with your product requirements. For example, with marker-ink, a table with writing marker suits best with your product.
6. From the products menu, you can pick the product’s picture from your uploaded products.
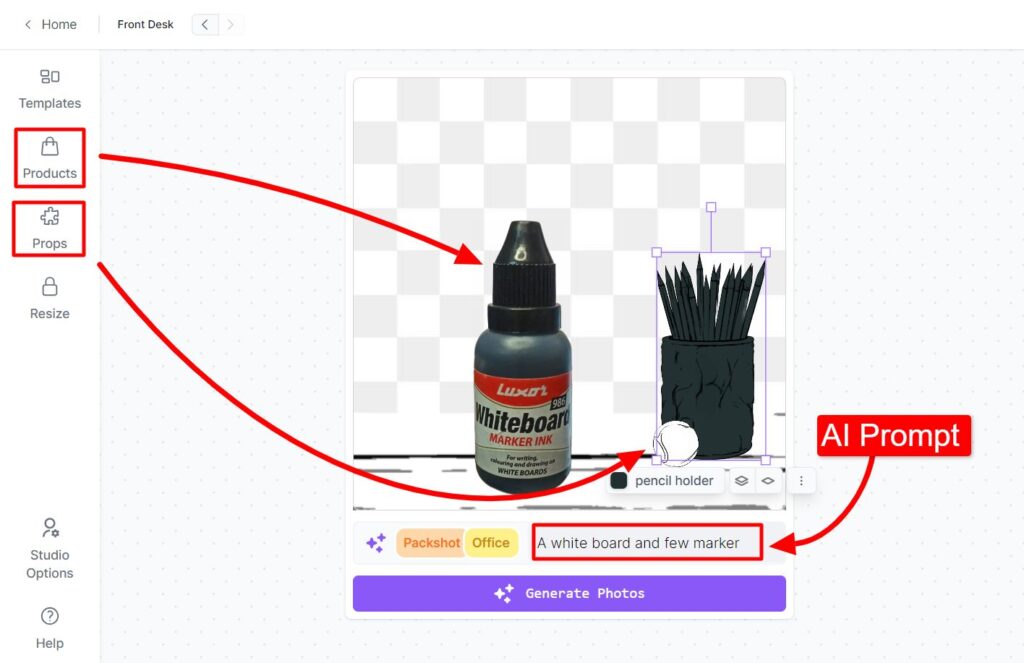
7. And, from the Props menu, more elements can be added in the background of the product image. These props are simple sketch that turns into real high quality image after you click on “generate”. This generation depends on the props as well on the prompt you write.

In our example, we have added a white board, a book, pen stand and a girl as our props.
The position of these props can be changed by simply dragging the props. Further, some props will be forward or backward based on your requirements. For example, the white board we picked is at the back while table is in front where our “ink bottle” is placed.
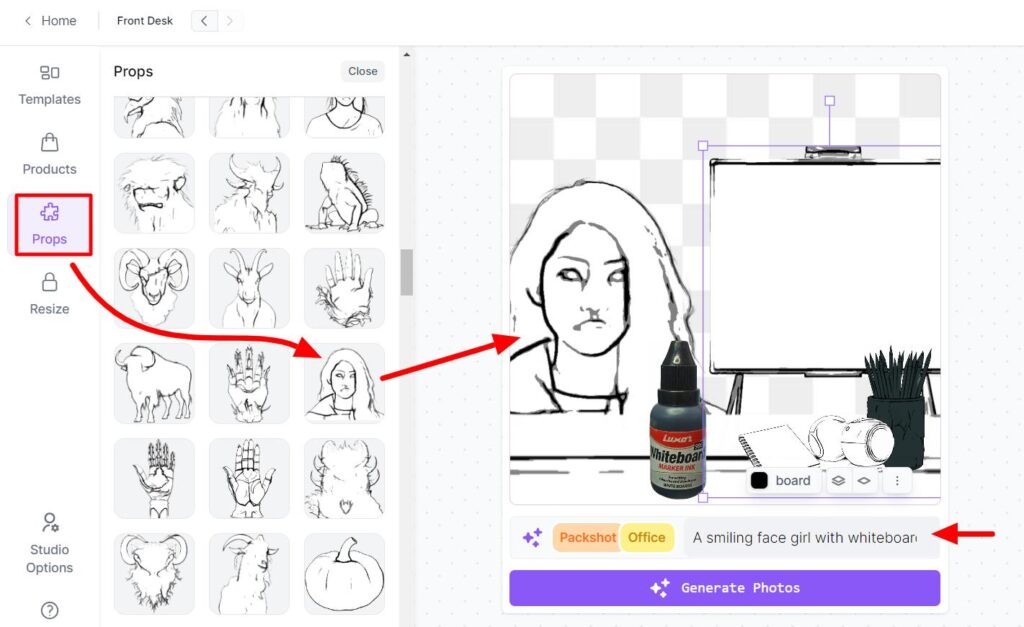
After selecting all these props and typing your prompt in the prompt box, click on “generate” to see the magic of Mokker AI
Mokker will generate 4 Results every time you click on generate. You can set the result to 2 or 6 from the settings of Mokker.
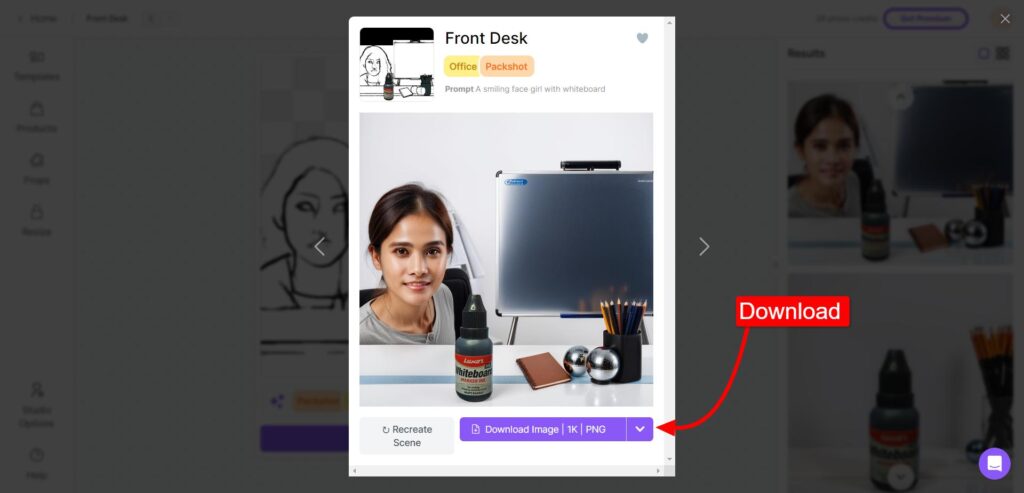
Here are the two best results I have got for the above example:
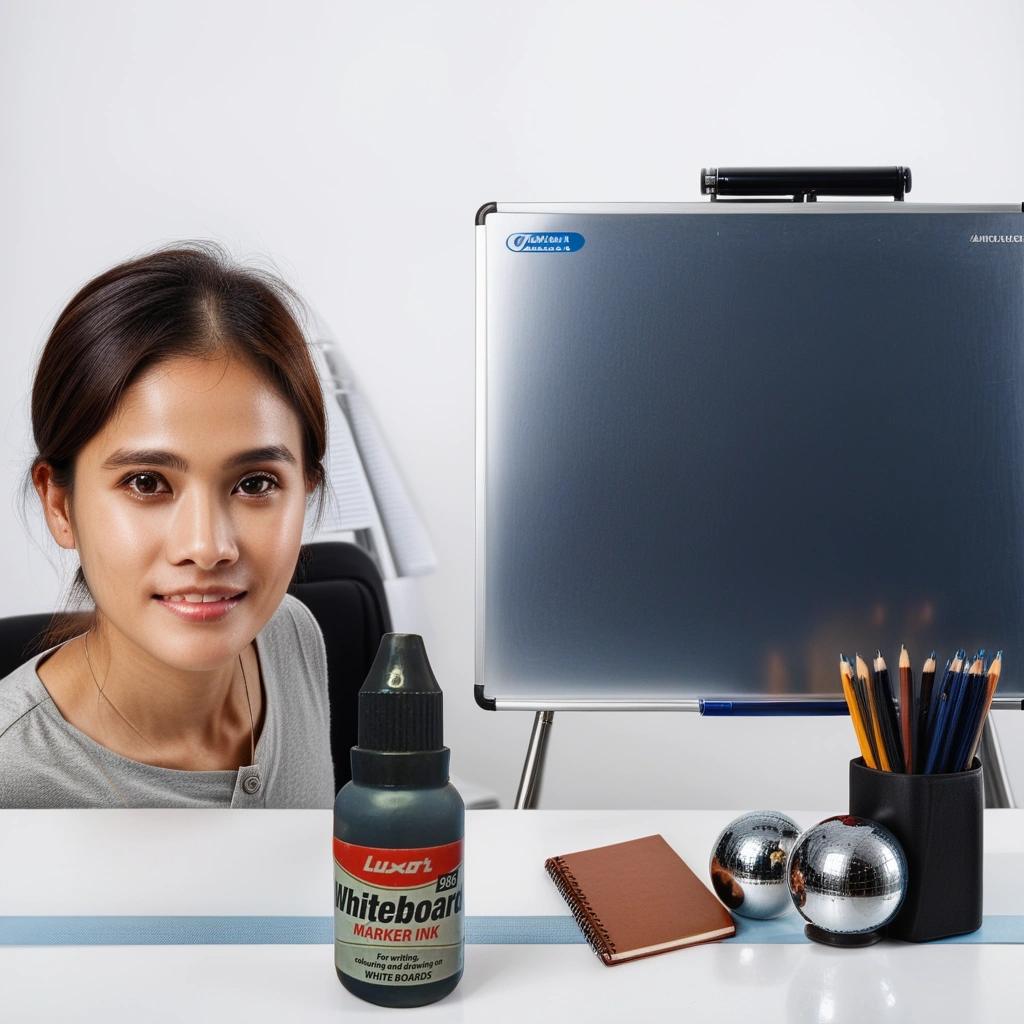
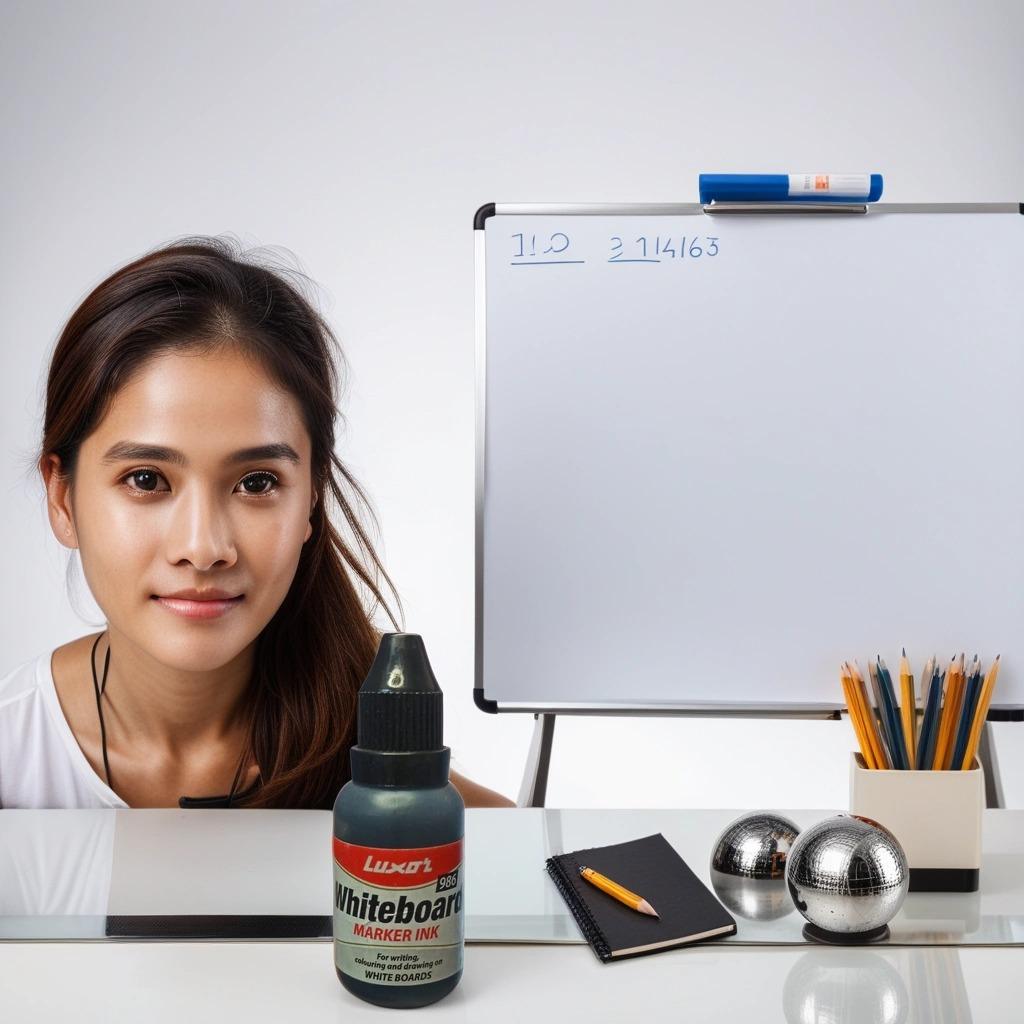
These images can finally be used in eCommerce sites or other eCommerce marketplace or social media platforms.
Cons of Using Mokker
These cons of Mokker AI can be eliminated with future updates or with practice.
- Mokker does not work in real-time. Or there is no live preview of outcome in real time. You get to see the final result only after product image is generated. For any further modification, the process needs to be repeated.
- Another major restriction I realized about Mokker is; it does not give any feature to enhance the product image. As in case of above example, if I wish to enhance the uploaded ink-bottle, or increase its brightness, I have no options for it on Mokker. Therefore, users need to completely rely on camera for it.
Pros of Using Mokker
There are lot more pros of Mokker AI than cons. Here we go:
- Its cost effective. Instead of spending dollars on studio setup, camera, models, lightening, background objects, editing software, etc. Shift to premium version of Mokker.
- It’s fast. Simply a good prompt, with right choice of props can result in high quality product images.
- Mokker offers 40 free generation. I am glad they don’t restrict it to 10 or 20. And, I hope they make it to 100.
- Mokker is targeted and built for eCommerce brands.
- There are more than 250+ templates in free plan to use.
Top Features of Mokker AI
We have so far learned to use Mokker and generated a product image as an example. Also, checked pros and cons. Let’s check some advance and premium features of Mokker.
- In premium plan, team members can be added using their email address. Adding team allows collaborative effort.
- All the images generated using Mokker are commercially owned by the user.
- All the uploaded products are saved in the Mokker dashboard, so that you can use it anytime.
- All the generated images are also saved as history under the menu “Images”. And, under “scene” menu you can check the
- Moodboard features lets you add 3 reference photos.
Pricing Plan
There are three plans of Mokker: Starter, team and Organization.
Starter plan in 19.99 Euro, which is around $21.82. This plan allows monthly 500 photos to generate.
Team plan which is 24 Euro or $49.13 allows 3 team account with unlimited photo generation.

End Notes
This is a powerful AI tool for eCommerce brands.
You may not get the desired result in the first trail of this tool but with practice you could save a good amount of time and money.
And, if you are still not using professional product photos on your eCommerce store, then this is the best opportunity for you to try and scale your revenue.
Thanks for reading. Comment how your find this article.

I do not even know how I ended up here but I thought this post was great I do not know who you are but certainly youre going to a famous blogger if you are not already Cheers